

Measure your living room’s length and width, multiply them for square footage, then match that number to the right blade diameter—up to 75 sq ft needs 29–36 inches, while 225+ sq ft requires 50–54 inches. Check your ceiling height for mounting type, ensure 18 inches of wall clearance, confirm your fan fits your ceiling depth, and pick a style that matches your décor. These straightforward steps guarantee you’ll nail the perfect fit, but there’s plenty more strategic detail worth exploring!
Step 1: Measure Your Living Room’s Square Footage

How’s the best way to find your perfect ceiling fan fit? Start by measuring your living room’s length and width. Grab a tape measure and jot down both numbers. Then multiply them together—that’s your square footage!
Why does this matter? Your room dimensions determine the ideal ceiling fan size. A fan too small won’t circulate air effectively. One too large? It’ll waste energy and look awkward.
Let’s say your living room measures 12 feet by 15 feet. Multiply: 12 × 15 = 180 square feet. That calculation guides your entire ceiling fan selection process.
You’ve got this! Knowing your square feet puts you in control. You’re not guessing anymore—you’re making informed decisions. This first step sets up everything ahead. Measure once, choose confidently!
Step 2: Match Your Square Footage to Ceiling Fan Diameter

Now that you’ve got your square footage locked down, it’s time to find the fan size that matches it perfectly! The American Lighting Association provides clear guidelines connecting your room area to the ideal ceiling fan diameter. Think of blade span as the diameter of the circle your fan blades sweep—it’s your blueprint for airflow coverage.
| Room Square Footage | Blade Span (Inches) | Fan Type | Best For |
|---|---|---|---|
| Up to 75 sq ft | 29–36 | Single fan | Bedrooms, small dens |
| 76–144 sq ft | 36–42 | Single fan | Standard living rooms |
| 144–225 sq ft | 44 | Single fan | Larger living areas |
| 225–400+ sq ft | 50–54 or dual fans | Single or double | Spacious rooms |
Don’t stress! Matching your measurements to these ranges ensures optimal performance and comfort throughout your space.
Step 3: Choose Your Mount Type Based on Ceiling Height
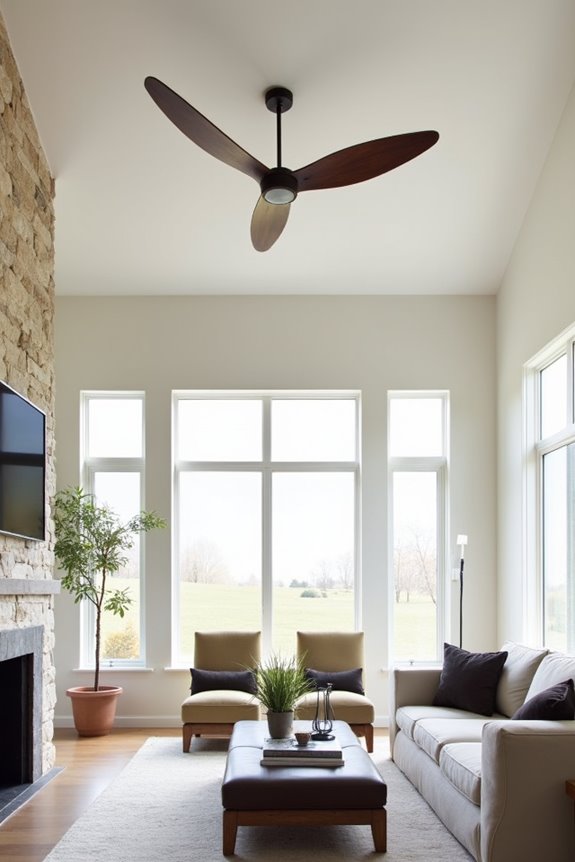
Your ceiling height is the game-changer here, so let’s match it with the right mounting style! If you’re working with a low ceiling under 9 feet, you’ll want a flush-mount or hugger fan that keeps the blades at least 7 feet from the floor—trust me, nobody enjoys a fan they can practically high-five. For standard 9-foot ceilings, you’ve got flexibility with a downrod (typically 3–5 inches), but taller rooms and vaulted ceilings let you extend that downrod up to 120 inches, which sounds wild but actually places airflow exactly where your room needs it most!
Flush-Mount For Low Ceilings
What if your living room’s ceiling sits at a cozy eight feet or lower? You’ll want a flush-mount ceiling fan—also called a hugger or low-profile fan. This smart choice mounts directly to your ceiling, eliminating the need for a long downrod length that’d eat up precious headroom.
Here’s why flush-mount works brilliantly for low ceilings: it keeps the fan’s lowest point snug against the ceiling, giving you safer clearance and maximizing your living space. You’re not sacrificing style or function either!
Before you commit, verify that your fan’s depth and blade pitch still generate adequate air movement for your room size. The right flush-mount ceiling fan size, combined with proper blade design, ensures you’re getting cooling power without the bulky appearance. Smart thinking!
Standard Mount With Downrods
If your living room boasts ceilings higher than eight feet, you’ve got the perfect opportunity to use a standard mount with a downrod!
This setup lets you hang your fan at the ideal height—about 8–9 feet above the floor. Here’s why this matters for you:
- Downrod lengths range from 3–5 inches typically, extending up to 120 inches for cathedral ceilings
- You’ll position your fan in the airflow zone where it circulates air most effectively
- Standard mount installations require verifying your ceiling supports and electrical capacity beforehand
- Your fan’s lowest point must stay above 7 feet for safety and comfort
- Longer downrods work beautifully in spaces with vaulted or high ceilings
Consider hiring an electrician if you’re unsure about wiring or need additional support. Getting this right means your ceiling height and downrod length work together perfectly, creating an efficient, visually balanced room.
Vaulted Ceiling Adapters Required
Ever noticed how cathedral and vaulted ceilings create such dramatic, beautiful spaces—but they also throw a wrench into standard ceiling fan installations? Here’s the thing: slopes over 34 degrees demand a sloped ceiling adapter kit. Think of it as your fan’s best friend!
This adapter replaces your standard canopy, aligning everything perfectly with your angled ceiling. Pretty clever, right? You’ll also likely need longer downrod length to maintain that ideal 7–9 feet clearance above floor—essential for safety and comfort.
The adapter keeps your fan safely away from walls while preserving excellent airflow. You’re not just mounting a fan; you’re creating a balanced, beautiful installation that respects your unique ceiling. Always follow manufacturer guidance for weight limits and hardware specifics. Your vaulted ceiling fan will thank you!
Step 4: Ensure 18 Inches of Clearance From Walls
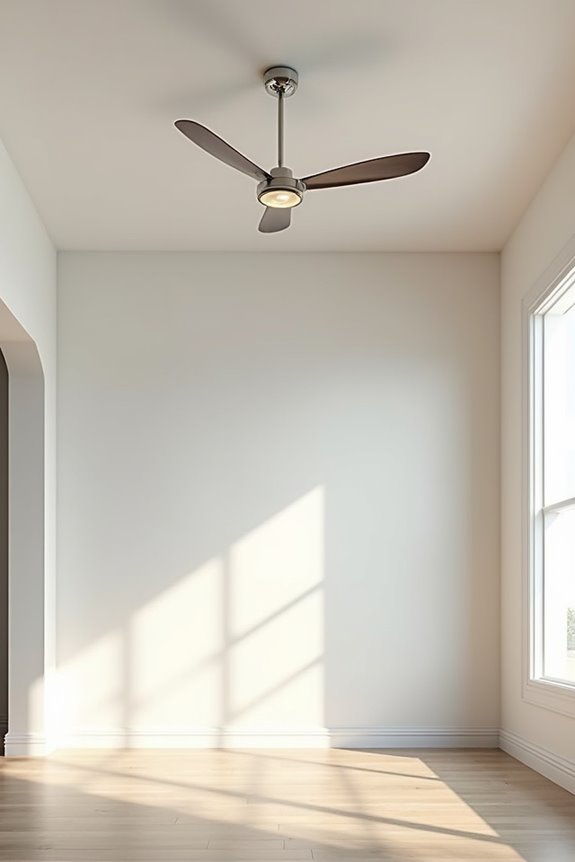
How’d you like your ceiling fan to work at its absolute best?
You’ll want to maintain proper ceiling clearance—specifically 18 inches from surrounding walls. This safety distance prevents obstructed airflow and keeps your fan operating efficiently. Here’s what this clearance accomplishes:
- Allows full blade sweep without hitting walls or décor
- Ensures consistent air distribution throughout your living room
- Eliminates safety hazards from blades nearing objects
- Protects your wall decorations and furniture from damage
- Maintains optimal performance and fan longevity
Tight spaces? No problem! Consider flush-mount or low-profile models that hug your ceiling closer. Downrods also help you achieve proper wall clearance in smaller rooms. Before installation, measure your specific space carefully—especially near built-in shelves or tall furniture. You’ve got this! Following the 18-inch rule guarantees your fan runs safely and effectively for years.
Step 5: Confirm Your Fan Size Doesn’t Exceed Your Ceiling Depth
You’ll want to measure your fan’s total depth—from the ceiling to its lowest blade tip—because even a sleek 52-inch fan can feel cramped if you don’t account for the downrod, motor housing, and light kit all stacked together. If your ceiling cavity is shallow or you’ve got ductwork hiding up there, a flush-mount or hugger fan keeps everything tucked in tight while still moving air around your living room. Check your manufacturer’s specs to confirm the maximum downrod length allowed, because adding an extra 6 or 12 inches to reach that perfect 8-foot hanging height might actually push past your ceiling’s limits!
Measuring Fan Depth Requirements
What’s hiding above your ceiling that you haven’t thought about yet?
Before you finalize your fan choice, measure your ceiling depth carefully. You’ll need to account for:
- Downrod height (typically 3–5 inches for standard installations)
- Flush mount options for low ceilings under 8 feet
- Clearance space above furniture and fixtures
- Light fixture depth if your fan includes lighting
- Mounting diagram specifications from your manufacturer
Check your ceiling’s actual depth by consulting your home’s blueprints or measuring physically. Standard downrods work great for most rooms, but longer rods on tall ceilings require extra space verification. Your lowest blade must stay above 7 feet from the floor—that’s non-negotiable for safety! Review the mounting diagram matching your specific ceiling type. This simple step prevents costly installation mistakes and ensures your fan operates smoothly without obstruction!
Ceiling Clearance Compatibility Check
Now comes the reality check—does your chosen fan actually fit in your space without hitting something unexpected?
You’ll want to verify your mounting depth against your ceiling cavity depth. Check your installation manual—it’s your friend here. Measure from the ceiling surface down to any structural elements or insulation. Your canopy shouldn’t contact anything!
Next, consider blade height. You need at least 7 feet clearance from the floor to your lowest blade for safe operation. Got tall ceilings? Perfect! Use longer downrod lengths to achieve 8–9 feet of clearance, which actually optimizes airflow circulation. Lower ceilings? No worries—flush-mount or hugger models work beautifully.
Double-check that your downrod length and overall fan height work together. Measure twice, install once—you’ve got this!
Light Kit Impact Considerations
- Light kits increase overall fan depth noticeably
- Standard 3–5 inch downrods may no longer work
- Your canopy depth affects total mounting space
- Combined clearance must stay above 7 feet
- Blade-to-ceiling requirements become stricter
Think of it this way: you’re not just mounting a fan anymore—you’re installing a lighting fixture too. Check your product specs for total hang height measurements before purchasing. If your ceiling’s average height, a longer downrod becomes essential. You’ll want at least 8 inches of clearance between your fan’s lowest blade and any obstruction. Trust me, measuring twice saves frustration later!
Step 6: Align Your Fan Size With Your Living Room Style

Here’s the thing about ceiling fans—they’re not just about pushing air around! Your ceiling fan size directly shapes your living room style, so choose wisely. For contemporary spaces, a 52-inch blade span hits that sweet spot—it looks proportional without overwhelming the room. Smaller living rooms (under 144 square feet) work best with 36–42 inch fans, while larger spaces need 50–54 inches for proper coverage. Don’t forget that blade count and motor pitch influence airflow perception, making your fan feel either gentle or powerful. Match your room dimensions to the right ceiling fan size, and you’ll create harmony between function and aesthetics. That’s when your space truly feels like home!
Step 7: Finalize Your Living Room Ceiling Fan Selection

Ready to make your final call? You’re almost there! Now it’s time to lock in your ceiling fan size choice by confirming everything works perfectly together.
Here’s your final checklist:
- Match your blade span to your room square footage using our sizing guidelines
- Verify clearance requirements (7 feet above floor, 18 inches from walls minimum)
- Confirm your ceiling height allows proper airflow coverage with a downrod if needed
- Check that your fan’s motor power suits your room’s dimensions
- Ensure the style you’ve chosen delivers both beauty and function
You’ve done the homework! Trust your measurements and calculations. Pick the fan that makes sense for your space, and you’ll enjoy perfect comfort all season long. Your living room’s about to feel amazing!